The panel, top to bottom
Everything QuadGuide does is in one sidebar tab (N in the 3D viewport, QuadGuide). This page walks it from top to bottom, section by section, with every button. The linked pages go deeper.
Before you select anything
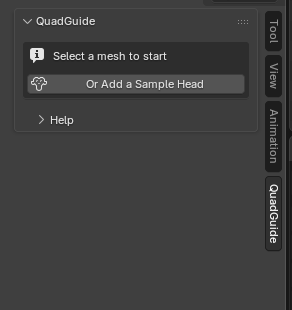
With no mesh selected the panel offers Add a Sample Head: Suzanne, subdivided, to try things on. Select any mesh in Object Mode and the panel switches to it. If a newer version exists, a line at the very top says so, with What's new.
Remesh
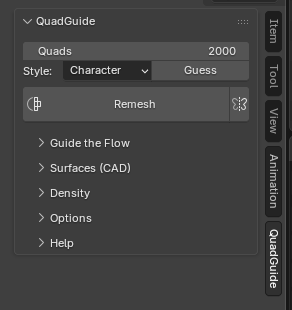
| Control | What it does |
|---|---|
| Quads | About how many quads you want. The result lands within a few percent. |
| Style | Character, Sculpt / Scan or Hard Surface: the settings for a kind of model. Change any Expert setting and it reads Custom. |
| Guess | Reads the selected mesh and sets the style for you, saying why in the status bar. Nothing changes until you press it. |
| Thorough | Hard Surface only: one more rounding of the quad grid, the result with fewer poles kept; a few seconds more. |
| Remesh | Runs. A progress bar replaces the button; Cancel (Esc) stops it at once. Blender stays usable. |
| The mirror icon | Symmetry: one half is remeshed and mirrored, an edge loop down the middle. |
| Update (N regions) | Appears above Remesh after you move a guide: remeshes only the regions that guide borders. |
Details: Remesh.
The result card
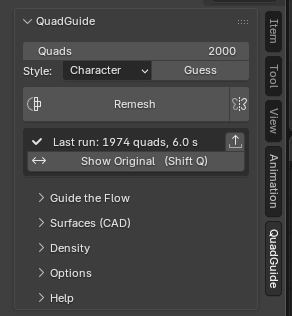
After a remesh the card shows one line, Last run, with the quads and the seconds it
took, and the export icon (Save Report: a zip of the run for a bug report). The result
is a new object, <name>_quadguide, in the original's place. Under the line:
| Control | What it does |
|---|---|
| Try | Shown when the result needs a touch-up: the other two styles, one click each, both results kept to compare. |
| Show Original / Show Result | Switches between the result and your mesh (Shift+Q). |
| Keep / Discard | When a new result has problems and you already had a good one, the new one arrives as a candidate: keep it or throw it away. |
| Select Them | When a few quads need a touch-up: selects them in Edit Mode and frames them. |
Details: The result.
Guide the Flow
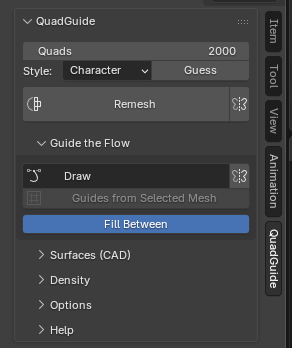
| Control | What it does |
|---|---|
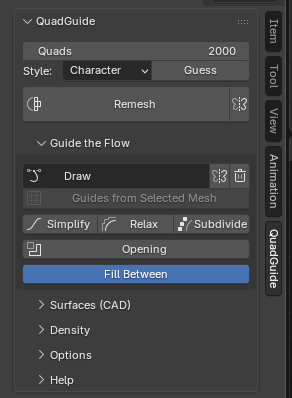
| Draw / Stop Drawing | Starts the guide tools in the viewport: freehand, line, circle, contour, two brushes, vertex loop. The keys: Drawing guides. |
| The mirror icon | Mirror X: draw one side, get the other. Turns Symmetry on as well. |
| Guides from Selected Mesh | Turns the edges of another mesh (an old retopo, a cage) into guides on this one. |
| Fill Between | On: your guides are the borders of patches, each region filled as its own patch. Off: the guides steer the flow only. |
With a guide selected, four more buttons appear, and the trash icon next to Draw clears every guide of the mesh:
| Control | What it does |
|---|---|
| Simplify | Fewer points, the shape kept. Tolerance in the redo panel. |
| Relax | Smooths the guide. |
| Subdivide | A point in the middle of each segment. |
| Opening | Marks a loop where the mesh goes on inward (the inside of a mouth): the remesh cuts it away there. |
When Fill Between is on and something keeps your drawing from filling, a box lists it with a button per fix and Fix All. The whole workflow: Drawing a patch network. More edits are in the right-click menu, Quad Guides: see The guide menu.
Surfaces (CAD)
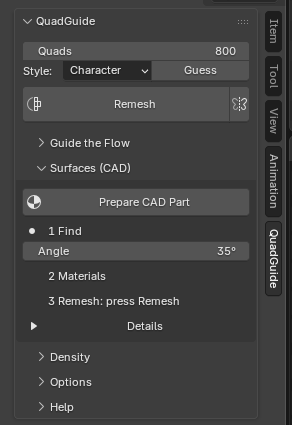
For technical parts. Prepare CAD Part finds the surfaces of the part and gives each its own material, so every border between them becomes an edge loop; the steps 1 Find, 2 Materials, 3 Remesh show where you are, with a count of the surfaces found. Angle sets how sharp a corner must be to separate two surfaces. Details holds the single steps and the rest of the settings (Sharp, Seams, Materials, Tangent, Curved, Merge Thin).
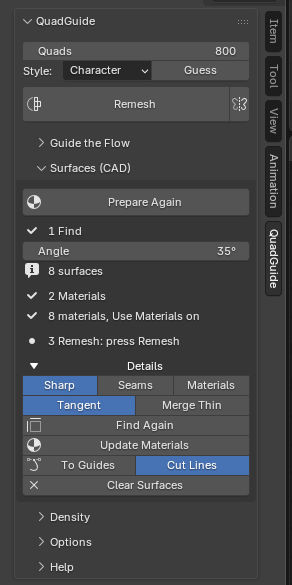
Details: Technical meshes (CAD).
Density
| Control | What it does |
|---|---|
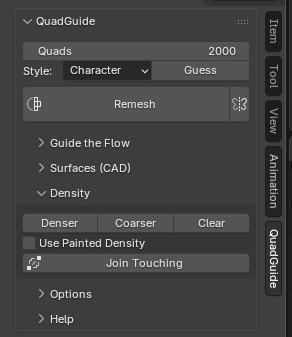
| Denser / Coarser / Clear | Paint where quads should be smaller (red) or larger (cyan); Clear resets. Done Painting goes back to Object Mode. |
| Use Painted Density | Whether the painted map is used. |
| Join Touching / Unjoin | Fuses walls that press together (fingers, lips) before the remesh. |
Details: Density.
Options
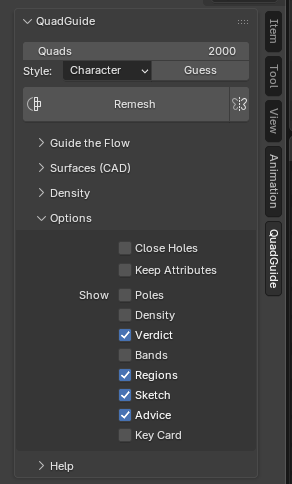
Close Holes caps the mesh's openings for the remesh; Keep Attributes carries vertex groups, UV maps and colours onto the result. Under Show, the viewport overlays: Poles, Density, Verdict, Bands, Regions, Sketch, Advice, Key Card. Details: Options.
In Edit Mode
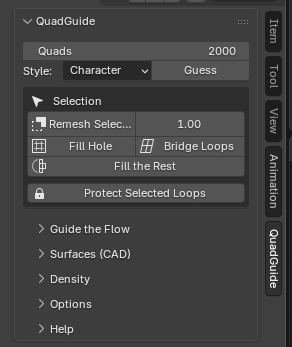
In Edit Mode the top of the panel shows the tools that work on a selection. Which ones depends on whether you are in your mesh or in a result:
| Control | What it does |
|---|---|
| Remesh Selected and Seam Density | Replaces the selected faces only; the density inside against the border. |
| Fill Hole | Caps a hole with quads: a circle in a square for a round one, a grid for one with corners. |
| Bridge Loops | Joins two loops with a band of quads, stepping the count down where you put the 3D cursor. |
| Fill the Rest | Remeshes what your partial retopo does not cover yet and joins it on. |
| Guide from Edges / Hard Edge | On your mesh: the selected edges become a guide; Hard Edge marks it sharp. |
| Protect Selected Loops | On a result (as in the picture): keeps the selected loops in the next remesh. |
Details: Edit Mode tools.
Expert
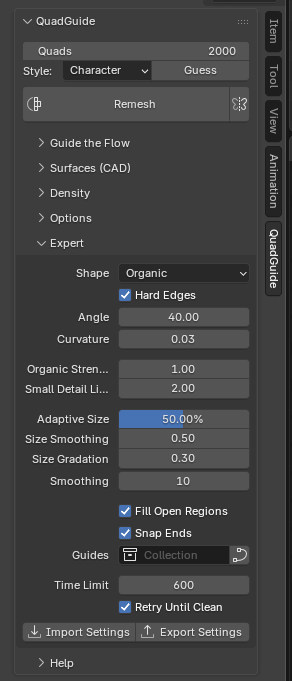
Shown when Expert Settings is on in the add-on's preferences: the sliders behind the styles (Shape, Hard Edges and Angle, Curvature, Organic Strength, Small Detail Limit, Adaptive Size, Size Smoothing, Size Gradation, Smoothing, Fill Open Regions, Snap Ends, the Guides collection, Time Limit, Retry Until Clean) and Import / Export Settings. Every one: Expert settings and All settings.
Review
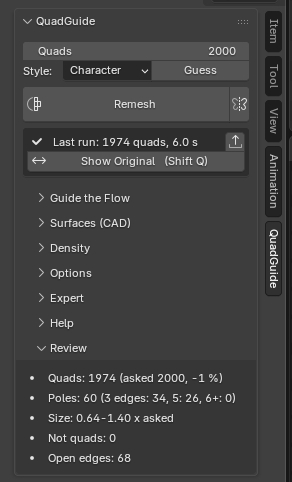
With Expert Settings on, a checklist under the result: quads against the count asked, poles, the spread of quad sizes, faces that are not quads, open edges. See Review.
Notes
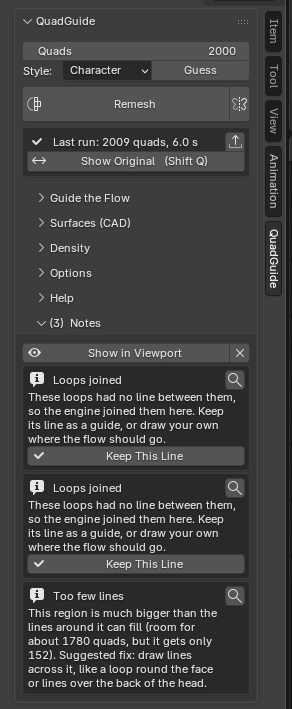
After a remesh with guides: what the engine had to change in your drawing, in plain words, one line each. The magnifier turns the view to the place; Fix applies the change it suggests, or selects what to fix by hand. Show in Viewport draws the notes' markers on the mesh; the broom clears them. See Notes.
Help
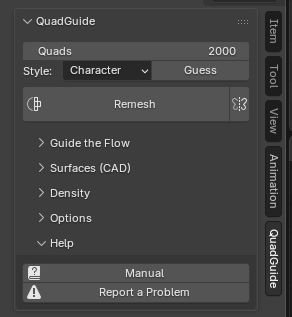
Manual opens this site. Report a Problem saves a zip with the last run, your mesh and your guides, opens its folder and starts a mail to support. See Reporting a problem.
Developer
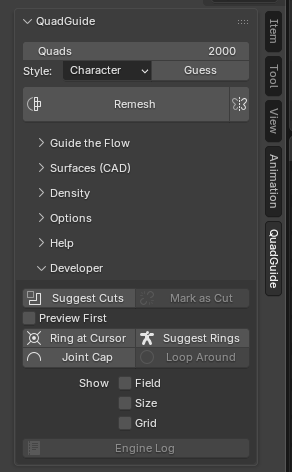
Shown when Developer Tools is on in the preferences. Tools still in testing; they work, but their results are not checked as the Remesh button's are, and they may change.
| Control | What it does |
|---|---|
| Suggest Cuts | Draws cut loops round the narrow places of a body (neck, arms, legs) as guides you can move or delete. |
| Mark as Cut | Makes the selected closed guides cut loops, or guides again. |
| Remesh in Parts | Cuts the mesh along the cut loops, remeshes the parts side by side and joins them edge for edge: faster on a body. A part that has not changed since the last run is reused. |
| Preview First | Without guides: a quick coarse remesh (a quarter of the quads) shows in a few seconds, so you can judge the flow while the full one runs. |
| Ring at Cursor | A ring round the limb under the 3D cursor. |
| Suggest Rings | Rings round the joints where the limbs narrow (wrists, elbows, knees, ankles, the neck), as guides. |
| Joint Cap | A cap for a joint from a selected ring. |
| Loop Around | Replaces selected open guides (a lip seam, an eye slit) with closed loops hugging them, so the rows wrap round. |
| Show: Field / Size / Grid | Debugging views: the cross field and its poles, a heat map of the quad size asked, the engine's working grid. |
| Engine Log | Opens the last run's log. |
Preferences
In Edit > Preferences > Add-ons > QuadGuide: Expert Settings (shows Expert and Review), Developer Tools (shows Developer), Engine (a path to another engine program; empty uses the one in the download), Check for Updates and Check Now, and Report a Problem once more. See Install.